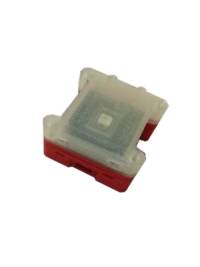
RGB LED näidis
LED RGB moodul peab olema ühendatud kas kontrolleri või anduri mooduliga.
Vajaminevad teegid:
lib_deps = ITTIoT, Adafruit NeoPixel
Antud näidiskood paneb RGB LED tule põlema:
#include <Arduino.h>
#include <ittiot.h>
#include <Adafruit_NeoPixel.h>

#define MODULE_TOPIC "ESP30/rgb"
#define WIFI_NAME "name"
#define WIFI_PASSWORD "password"

//Stating, to which PIN the RGB LED has been connected
#define PIN            D2

// When we setup the NeoPixel library, we tell it how many pixels, and which pin to use to send signals.
// Note that for older NeoPixel strips you might need to change the third parameter--see the strandtest
// example for more information on possible values.
Adafruit_NeoPixel pixels = Adafruit_NeoPixel(1, PIN, NEO_GRB + NEO_KHZ800);

// Splitting string into smaller parts, so that the colour code can be set to the RGB LED
// https://stackoverflow.com/questions/9072320/split-string-into-string-array
String getValue(String data, char separator, int index)
{
  int found = 0;
  int strIndex[] = {0, -1};
  int maxIndex = data.length()-1;

  for(int i=0; i<=maxIndex && found<=index; i++)
  {
    if(data.charAt(i)==separator || i==maxIndex)
    {
        found++;
        strIndex[0] = strIndex[1]+1;
        strIndex[1] = (i == maxIndex) ? i+1 : i;
    }
  }
  return found>index ? data.substring(strIndex[0], strIndex[1]) : "";
}

// Changes the RGB LED color and send this info to the computer over COM port
// mosquitto_pub -u test -P test -t "ITT/IOT/3/rgb" -m "51;255;153"
void iot_received(String topic, String msg)
{
  Serial.print("MSG FROM USER callback, topic: ");
  Serial.print(topic);
  Serial.print(" payload: ");
  Serial.println(msg);

  if(topic == MODULE_TOPIC)
  {
    // Splitting the RGB values into smaller parts
    String r = getValue(msg,';',0);
    String g = getValue(msg,';',1);
    String b = getValue(msg,';',2);

    Serial.print("R: ");
    Serial.println(r);

    Serial.print("G: ");
    Serial.println(g);

    Serial.print("B: ");
    Serial.println(b);

    // Sending the color code to the RGB LED
    pixels.setPixelColor(0, r.toInt(), g.toInt(), b.toInt()); // Moderately bright green color. The 0 number addresses the first RGB LED (is the address number)
    pixels.show(); // This sends the updated pixel color to the hardware.
  }
}

// Subscrining to a MQTT topic, to get the RGB color code for the RGB LED
void iot_connected()
{
  Serial.println("MQTT connected callback");
  iot.subscribe(MODULE_TOPIC);
  iot.log("IoT NeoPixel example!");
}

// Setting up some parameters for the ESP microcontroller
void setup()
{
  Serial.begin(115200); // setting up serial connection parameter
  Serial.println("Booting");

  //iot.setConfig("wname", WIFI_NAME);
  //iot.setConfig("wpass", WIFI_PASSWORD);
  iot.printConfig(); // print json config to serial
  iot.setup();

  pixels.begin(); // This initializes the NeoPixel library.
}

//Main code, which runs in loop
void loop()
{
  iot.handle(); // Calls iot.handle out
  delay(200); // Delay of 200 ms
}


