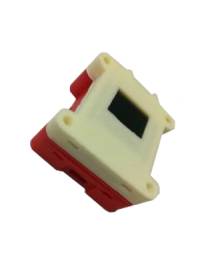
Oled ekraani näidis
Oled moodul peab olema ühendatud kontrolleri või anduri mooduliga.
Vajaminevad teegid:
lib_deps = ITTIoT, Adafruit GFX Library, Adafruit SSD1306 Wemos Mini OLED, adafruit/Adafruit BusIO
Näidiskood näitab loenduri väärtust ekraanil:
#include <Arduino.h>
#include <ittiot.h>
#include <Ticker.h>
#include <ESP8266WiFi.h>
#include <Adafruit_I2CDevice.h>
#include <Adafruit_GFX.h>
#include <Adafruit_SSD1306.h>

#define WIFI_NAME "name"
#define WIFI_PASSWORD "password"

// OLED reset pin is GPIO0
#define OLED_RESET 0  // GPIO0

Ticker timeTicker;
Adafruit_SSD1306 display(OLED_RESET); // Create an object for OLED screen

bool isBootModeNormal;
bool sendDataFlag;

int i = 0; // Counter variable is defined

// ITT splashs screen bitmap. Generator can be found in: http://javl.github.io/image2cpp/
static const unsigned char PROGMEM logo16_glcd_bmp[] =
{
  0x00, 0x00, 0x00, 0x00, 0x00, 0x00, 0x00, 0x00, 0x00, 0x07, 0xf0, 0x00, 0x00, 0x00, 0x00, 0x00,
	0x00, 0x07, 0x10, 0x00, 0x00, 0x00, 0x00, 0x00, 0x00, 0x07, 0x10, 0x00, 0x00, 0x00, 0x00, 0x00,
	0x00, 0x07, 0x10, 0x00, 0x00, 0x00, 0x00, 0x00, 0x00, 0x07, 0x10, 0x00, 0x00, 0x00, 0x00, 0x00,
	0x00, 0x07, 0x1f, 0xff, 0xff, 0xc0, 0x00, 0x00, 0x00, 0x07, 0x00, 0x00, 0x00, 0xc0, 0x00, 0x00,
	0x00, 0x07, 0x00, 0x00, 0x00, 0xc0, 0x00, 0x00, 0x00, 0x07, 0x00, 0x00, 0x00, 0xc0, 0x00, 0x00,
	0x00, 0x07, 0x1f, 0xe3, 0xff, 0xc0, 0x00, 0x00, 0x00, 0x07, 0x1f, 0xe3, 0xff, 0xc0, 0x00, 0x00,
	0x00, 0x07, 0x10, 0xe2, 0x00, 0x00, 0x00, 0x00, 0x00, 0x07, 0x10, 0xe2, 0x00, 0x00, 0x00, 0x00,
	0x00, 0x07, 0x10, 0xe2, 0x00, 0x00, 0x00, 0x00, 0x00, 0x07, 0x10, 0xe3, 0xff, 0xff, 0xf8, 0x00,
	0x00, 0x07, 0x10, 0xe0, 0x00, 0x00, 0x18, 0x00, 0x00, 0x07, 0x10, 0xe0, 0x00, 0x00, 0x18, 0x00,
	0x00, 0x07, 0x10, 0xe0, 0x00, 0x00, 0x18, 0x00, 0x00, 0x07, 0x10, 0xe3, 0xfc, 0xff, 0xf8, 0x00,
	0x00, 0x07, 0x10, 0xe3, 0xfc, 0xff, 0xf8, 0x00, 0x00, 0x07, 0x10, 0xe2, 0x1c, 0x80, 0x00, 0x00,
	0x00, 0x07, 0x10, 0xe2, 0x1c, 0x80, 0x00, 0x00, 0x00, 0x07, 0x10, 0xe2, 0x1c, 0x80, 0x00, 0x00,
	0x00, 0x07, 0x10, 0xe2, 0x1c, 0x80, 0x00, 0x00, 0x00, 0x07, 0x10, 0xe2, 0x1c, 0x80, 0x00, 0x00,
	0x00, 0x07, 0x10, 0xe2, 0x1c, 0x80, 0x00, 0x00, 0x00, 0x07, 0x10, 0xe2, 0x1c, 0x80, 0x00, 0x00,
	0x00, 0x07, 0xf0, 0xe2, 0x1c, 0x80, 0x00, 0x00, 0x00, 0x00, 0x00, 0xe2, 0x1c, 0x80, 0x00, 0x00,
	0x00, 0x00, 0x00, 0xe2, 0x1c, 0x80, 0x00, 0x00, 0x00, 0x00, 0x00, 0xe2, 0x1c, 0x80, 0x00, 0x00,
	0x00, 0x00, 0x00, 0xe2, 0x1c, 0x80, 0x00, 0x00, 0x00, 0x00, 0x00, 0xe2, 0x1c, 0x80, 0x00, 0x00,
	0x00, 0x00, 0x00, 0xe2, 0x1c, 0x80, 0x00, 0x00, 0x00, 0x00, 0x00, 0xe2, 0x1c, 0x80, 0x00, 0x00,
	0x00, 0x00, 0x00, 0xe2, 0x1c, 0x80, 0x00, 0x00, 0x00, 0x00, 0x00, 0xfe, 0x1c, 0x80, 0x00, 0x00,
	0x00, 0x00, 0x00, 0x00, 0x1c, 0x80, 0x00, 0x00, 0x00, 0x00, 0x00, 0x00, 0x1c, 0x80, 0x00, 0x00,
	0x00, 0x00, 0x00, 0x00, 0x1c, 0x80, 0x00, 0x00, 0x00, 0x00, 0x00, 0x00, 0x1c, 0x80, 0x00, 0x00,
	0x00, 0x00, 0x00, 0x00, 0x1c, 0x80, 0x00, 0x00, 0x00, 0x00, 0x00, 0x00, 0x1c, 0x80, 0x00, 0x00,
	0x00, 0x00, 0x00, 0x00, 0x1c, 0x80, 0x00, 0x00, 0x00, 0x00, 0x00, 0x00, 0x1c, 0x80, 0x00, 0x00,
	0x00, 0x00, 0x00, 0x00, 0x1f, 0x80, 0x00, 0x00, 0x00, 0x00, 0x00, 0x00, 0x00, 0x00, 0x00, 0x00
};

// Ticker library callback, which will occur 0.5 second interval.
void sendData()
{
  sendDataFlag=true;
}

// If message received print it out.
void iot_received(String topic, String msg)
{
  Serial.print("MSG FROM USER callback, topic: ");
  Serial.print(topic);
  Serial.print(" payload: ");
  Serial.println(msg);
}

// Function started after the connection to the server is established.
void iot_connected()
{
  Serial.println("MQTT connected callback");
  iot.log("IoT OLED screen example!");
  isBootModeNormal = true;
}

void setup()
{
  Serial.begin(115200); // setting up serial connection parameter
  Serial.println("Booting");

  // initialize with the I2C addr 0x3C (for the 64x48)
  display.begin(SSD1306_SWITCHCAPVCC, 0x3C);

  // Since the buffer is initialized with an Adafruit splashscreen
  // internally, we should clear it
  display.clearDisplay();

  // Load ITT splash screen into buffer
  display.drawBitmap(0, 0,  logo16_glcd_bmp, 64, 48, 1);
  // Show image buffer on the display
  display.display();

  // Display splashscreen two second
  delay(2000);

  //iot.setConfig("wname", WIFI_NAME);
  //iot.setConfig("wpass", WIFI_PASSWORD);

  // print IoT json config to serial
  iot.printConfig();

  // Initialize IoT library
  iot.setup();

  // Initialize Ticker interval and callback
  timeTicker.attach(0.5, sendData);
}

// Main code, which runs in loop
void loop()
{
  // IoT behind the plan work, it should be periodically called
  iot.handle();

  // Increase counter value by 1
  i++;

  // Display counter value on the OLED screen
  display.clearDisplay(); // clears the srceen
  display.setTextSize(1); // sets the text size for the screen
  display.setTextColor(WHITE); // text color is set to white
  display.setCursor(0,0); // position from where the text writing is starting
  display.println("Counter: "); // a text is send to the screen
  display.println(i); // counter value is send to the screen
  display.display(); // show image

  // Send counter value to the computer
  if(WiFi.isConnected() && isBootModeNormal)
  {
    if(sendDataFlag)
    {
      sendDataFlag = false;
      String msg = String(i);
      iot.publishMsg("count", msg.c_str());
      Serial.println(msg);
    }
  }

  delay(500); // delay of 0.5s, to change the counter value slowly
}


