This is an old revision of the document!
Servo example
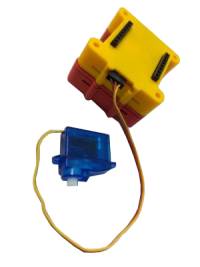
Servo motor has to be connected to the sensor module. Motor cable pins has to be connected to left side of the sensor pins, and also the brown cable(GRND) has to be connected to the left side of the pin.
Needed libraries:
lib_deps = ITTIoT@1.0.5
/*
 * IoT Servo example
 *
 * This example subscribe to the "servo" topic. When a message received, then it
 * change servo position
 *
 * Created 11 Sept 2017 by Heiko Pikner
 */

#include <Arduino.h>
#include <Servo.h>
#include <ittiot.h>

//Pin definition for the Servo (D3)
#define SERVO_PIN            D3

Servo myservo;  // create servo object to control a servo

// Change the servo position (value between 0 and 180)
// mosquitto_pub -u test -P test -t "RL/esp-{ESP-ID}/servo" -m "51" = this calls servo motor to change position

void iot_received(String topic, String msg)
{
  Serial.print("MSG FROM USER callback, topic: ");
  Serial.print(topic);
  Serial.print(" payload: ");
  Serial.println(msg);

  Serial.print("Servo: ");
  Serial.println(msg);

  myservo.write(msg.toInt());
}

// Function started after the connection to the server is established
void iot_connected()
{
  Serial.println("MQTT connected callback");
  // Subscribe to the topic "servo"
  iot.subscribe("ESP01/servo");
  iot.log("IoT Servo example!");
}

void setup()
{
  Serial.begin(115200);
  Serial.println("Booting");

  // Print json config to serial
  iot.printConfig();
  // Initialize IoT library
  iot.setup();

  myservo.attach(SERVO_PIN);
}

void loop()
{
  // IoT behind the plan work, it should be periodically called
  iot.handle();
  delay(200);
}


