This is an old revision of the document!
DHT example
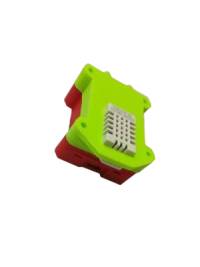
DHT module must be connected to controller module or with sensor module.
NB! If your DHT shield has one leg removed as in the picture below, please change the #define DHTPIN D4 to D3 in the program code.
Needed libraries:
lib_deps = ITTIoT, DHT sensor library, Adafruit Unified Sensor
The example code above will print out current Tempeture and Humidity in the room
// Includes global variables and librarys that the Temperature & humidity shield uses
#include <Arduino.h>
#include <ittiot.h>
#include <DHT.h>

#define WIFI_NAME "name"
#define WIFI_PASSWORD "password"

#define DHTPIN D4     // what pin we're connected to. Change this to D3 if your shield has one leg removed.
#define DHTTYPE DHT22   // DHT 22  (AM2302)

// Create an object for DHT sensor
DHT dht(DHTPIN, DHTTYPE);

// Function started after the connection to the server is established.
void iot_connected()
{
  Serial.println("MQTT connected callback");
  iot.log("IoT DHT example!");
}

void setup()
{
  Serial.begin(115200); // setting up serial connection parameter
  Serial.println("Booting");

  //iot.setConfig("wname", WIFI_NAME);
  //iot.setConfig("wpass", WIFI_PASSWORD);
  iot.printConfig(); // print json config to serial
  iot.setup(); // Initialize IoT library

  pinMode(16, OUTPUT);
  dht.begin(); // activating temperature and humidity functions
}

void loop()
{
  iot.handle(); // IoT behind the plan work, it should be periodically called

  float h = dht.readHumidity(); // reading humidity values
  float t = dht.readTemperature(); // reading temperature values

  char buf[10]; // Put whatever length you need here, defining char variable
  String(t).toCharArray(buf,10); // converting temperature value into string
  digitalWrite(16,HIGH);
  iot.publishMsg("temp",buf); // publishing temperature value to MQTT broker
  delay(2000); // wait 2 seconds

  digitalWrite(16,LOW);
  String(h).toCharArray(buf,10); // converting humidity value into string
  iot.publishMsg("hum",buf); // publishing humidity value to MQTT broker
  delay(2000); // wait 2 seconds
}


